Tuesday, October 2, 2007

Skeletons On My Worktable

Well, armatures actually, but they serve the same function. I actually finished the man's armature last week but just got the woman's done tonight (without bulking it up yet since I need to wait until the man's partially sculpted before filling her out more).

So, the guy first. I tried using 16 guage wire first but it didn't work because it was too thin. He really needed to have a thicker armature since he's going to be supporting another figure. So I used the 9 guage again, although I think I would've preferred 11.5 guage. Unfortunately, 11.5 guage is very hard to find here for some reason. I'll be ordering some from Dick Blick I guess.

Anyway, I used the 9 guage I'd gotten from Dick Blick--coated aluminum wire. It's very easy to manipulate and, because of the coating, it kind of sticks to itself (similar to waxed thread versus unwaxed) which made it easy to wrap the arm wires around the main torso wire. The reason I know this is I got some uncoated wire from Michael's for the woman's armature which was also 9 guage and it was a lot more difficult to work with because it didn't stick as well.

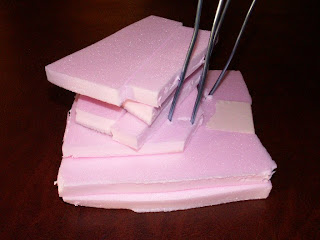
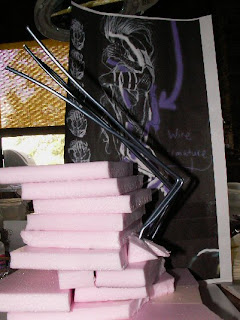
Well, after much wrapping and bending, adding foil and wrapping in floral tape, I had a passable armature for the feller.


Next was to do a little tweaking on his armature based on some suggestions from the instructor. Just a little adjustment on the back, pinching the shoulders so they're not so thick, and eventually adjusting the head.

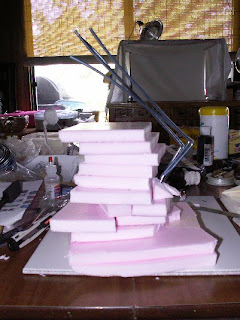
The woman's armature followed and was slightly more difficult because of the wire I was using. She came together pretty well though but I can't do any bulking up on her with foil and tape until I've sculpted the man's torso, so this body postion for her is approximate--it'll definitely require adjusting once I've done a little sculpting on the man.


The best thing about doing the woman's armature now was that I could adjust the man's even more. I found I had to raise his left arm a bit and bend his right out a little differently for the pose I want to work. It's coming together nicely, though.


They make such a nice couple, don't you think? Read more...

Sunday, September 30, 2007

Bases, Everyone! Bases!

Yep, I'm a bit behind. I actually finished the base and have half my armature done. The man's armature is almost completed...

But, I'm getting ahead of myself. The base is finished--11 layers! The wires go through three layers and then the rest of the base is just built up for the man to sit on. I worked off the picture with the black background because I like that base and the man's seated position best.

The hardest part was using the two-part epoxy. Not mixing it or anything like that, just spreading it. I finally gave up on the ruined paintbrush and the paint spatula and pulled out a bag of cheapie sponge brushes. Figured that at least they were cheap enough to be considered disposable when they got stiff with epoxy. Of course, I think it took me 9 layers to figure that out.

I wasn't too concerned about everything being lined up or anything. My current plant for the final base is to be a crumbling stone wall of some sort, so there will be some pretty rough areas. Plus, I figure I can cut away and shape whatever I need to when I get to that point.

So, pics...these first two show the beginnings of how I built up the layers. I basically added a few, and then some more until I found a height I thought would work based on where the man's butt is going to be resting. I didn't glue them (except the first two when I initially started the base) until I had all the layers in place the way I wanted.


And I realized as I was going that I would have to bend the lower leg armatures into the proper positions to be able to set the layers properly.  So I took a little time to do that. This was a bit new to me--I'm used to making my armatures and sculpting the figure, leaving some wire extending out of the legs or backside (depending on what's attaching to the base) instead of working from the base up. I found it a little hard to visualize the feet at first and how the ankles would bend, etc., because of this. It definitely helped to have a printed template to work from--really helped me visualize how the feet and ankle parts would come together.


The final picture just shows the base with the armature. A slightly better view of the wires since they're harder to see with the black template behind them.


And on to the body armatures next. I do have the man's mostly done and haven't even started on the woman's yet, so I'm partway there. I have to do a little tucking, pressing, sharpening some bends, etc. to make the man's armature follow the template a little more closely. But, that's for later... Read more...

Tuesday, September 25, 2007

Aves Sculpting Class--the Design

So, after a bit of searching, as mentioned, I found a design I like. It'll be perfect as a jumping off point.


The instructor, Rebecca, helped me immensely by doing a sketch of it with armature markings, head-length measurements and had an idea for building up the base behind and underneath the man since that figure would be the anchor or trunk and needed to be strong enough to support the man's upper body plus the woman's body. I originally was planning on having the man kneeling but I think, structurally, it will be better to have him sitting on something so it's not just his legs supporting everything. Plus, I can make his support a crumbling stone wall of some sort. The idea got me to envisioning the couple with the wind ruffling or blowing their clothes and hair a bit. But then, maybe that vision will change as I get further along.

So pics of the design and the base that I like:


The first one shows the full drawing and I'm planning on going with the upper half, with the woman entwined over the man's upper body, his arm supporting her. The second drawing shows the lower half only, with the man sitting on the base, his feet resting at a slant--I just like the way it looks better with the man fully sitting against the stones base rather than the first picture where he looks more like he's resting his body agains something.

Right, that's all for the moment, although I have worked on the base a bit, I'm not done and I have to go make 75 promotional items to ship on Thursday--yikes! Read more...

Saturday, September 22, 2007

Class Update--Wherein I explain how I've accomplished very little

This is a quickie since I have to leave for a guild meeting in less than an hour.

I decided on a design--a female vampire in the middle of biting a male victim--and spent quite a bit of time looking for possible poses online. Yep, I image-googled "embrace," "vampire and victim," "vampire embrace," and even looked at specific vamp movies with actors I liked. Looked up a few other possible search combos ("woman hugging man" etc.). There wasn't a lot to work with but I finally found something with a pose I LOVE.

The woman is wrapped around the man at his shoulders and they're kissing, which I don't exactly want. The sketch I found doesn't show the man's lower body but that's probably fine because I'm going to make him kneeling. I think I'll have the man kissing the vampire's neck and the woman preparing to bite. I really want the vampire aspect to be very subtle so that people looking at it don't notice that right away--just that there's an embracing couple.

Alright, gotta run now... Read more...

Tuesday, September 18, 2007

Class, class, class

My first post here and I'm very excited because I started a sculpting class today with Rebecca Schumacher (Rebas-Art)! She's teaching an online class at joggles.com on sculpting with Aves Apoxie Sculpt. I figured I'd set up this blog mostly to just document what I'm doing there, how the class is going, and post pics as I go.

Nope, I don't really have anything to post yet, other than my enthusiasm. Though I did get most of my supplies today. One thing is on order (the most important material, the Apoxie Sculpt), but I pretty much have everything else. It should be here by the end of the week.

Why this class? Well, to start, I LOVE Rebecca's work. Plus, I've heard nothing but good things about her as a teacher. I actually emailed her prior to signing up for the class and she's a real sweetheart. Although I haven't used AS (Apoxie Sculpt) much and didn't enjoy working with it when I did, I'm not sure I had good techniques down for working with it and I really think the possibilites of a sculpting medium like this are very good. Plus, it's supposed to be extremely strong when it's cured--one thing I'm not thrilled about with air-dry clay, or even polymer. So I'm hoping that I can learn techniques for working with the AS that will make it a pleasure.

What am I hoping to learn? Everything I can. Starting from the ground up in creating a sculpted figure. My armatures work but could probably use some beefing up (make them stronger and more functional, really). I'm also very keen on learning painting techniques since we're using a single color for the sculpture and my painting skills could use a lot of work. In fact, the painting aspect is one reason I've stuck with polymer clay for so long. I know how to work with the clay colors but need a lot of work and instruction on working with paints to color a piece properly.

And now, I'm onto other things for the time being. Read more...